Anyway - to start. The rolls for scenery saw all of it appear on Russ' side of the table - so I had nothing to hide my pike phalanxes behind nor protect my flanks. We drew the initiative roll but Alexander gave me the edge and we laid the troops out in fairly standard fashion - skirmishers to the front, cavalry on the flanks etc.
In picking troops, this time I decided to get a BG of hoplites instead of pike and stuck them on the right flank with the hypaspists to protect the pikes. The Agema and Thessalians went on the left (to attack Russ' two BG of cavalry) with the rest rolling up the middle.
It looked like a good plan. The spears did well against the horses last time and I was sure the Agema and Thessalians would win through on the left.
So all I had to do was scare his archers off, get the pikes and hoplites in (the pikes being 4 deep) and enjoy the victory.
My prodomoroi tried to chase off Russ' slingers from the right flank. Unfortunately they are not much good at anything. Being unprotected light horse they are worryingly exposed to missile fire (++ for people shooting at them) and not much good in a fight with anything other than light horse. They therefore fell to missile fire, lost a base etc. then failed to run away sufficiently (a 1 on the VMD) when Russ' cavalry attacked them. They therefore got caught and crushed. I don't think I'll use them again.

Prodomoroi / slingers getting crushed.
I therefore had to move my hypaspists and hoplites to protect the right flank. In the centre my slingers were also faring badly. Going Disrupted then Fragmented from Russ' archers. I had to get Alexander in to save their little candy asses!

The Agema batter the Persian cavalry.
Anyway, the Agema made short work of the Persian heavy - then found themselves with not a lot to contribute. No cavalry around and I didn't want to repeat the debacle of last week (the double 1 on cohesion) so decided to chase his archers around. Trouble is, they move as fast as my cavalry, so I ended up just chasing shadows. In hindsight, I should have just charged some of his infantry and got some value our of them.
The Apple Bearers chase off my javelins, but are now exposed...
In the middle it was looking OK though, The pike were 4 deep and the hoplites 3 deep. Whoever they eventually contacted would be in a world of hurt. Russ' foot were delpoyed to my right, meaning that my lot were likely to only contact 2BG at worst (1BG at best). I sent forward my javelins to chuck spears at his Apple Bearers - who charged them in turn. As they only have 2 bases, it meant that any hits would cause cohesion tests and the potential to take a base off as well. The Apple Bearers found themselves alone.
Alexander managed to bolster the slingers back to Disrupted, just as the prodomoroi Broke on one side as the Persian cavalry Broke on the other. So not looking too bad for Macedon at this stage.

The Apple Bearers don't like the javelins and go Disrupted. The Agema are free to wander...
The javelins got some extra hits in and the Apple Bearers lost cohesion. The Agema now had free rein to wander round the back of the Persians. At this stage I should have either attacked his hoplites in the flank OR gone for the camp. Instead I tried to chase his archers (who were pinging shots in) away.
Back in the centre, Alexander (after a stirring speech) got the slingers back to Steady again - just in time to have another bash at the archers facing them. Russ moved a commader forward to bolster the Apple Bearers.


The Apple Bearers in serious bother, as are the Persian archers.
The javelins got some more hits on the Apple Bearers - who dropped to Fragmented - and therefore prompted the Javelins to charge them. My slingers also got some licks in on the archers, who dropped a level. The centre was looking good and the pikes and hoplites pressed forwards.
Then came one of those incidents that are really, really frustrating when you play Field of Glory. My hypaspists charged the cavalry. They were on a + and had Alexander close by. Somehow (i.e. Russ throwing excellent dice) they lost the impact then - only needing a 5 to stay steady, they roll a double 1. The same thing happened last week with my Agema. Suddenly, from being in a strong position, my flank turned to mush.

Double bloody 1!!!!
The inevitable happened. They got battered in the melee and Broke - and in seconds one of my best units had gone from the field. Had they made the cohesion test I've no doubt they'd have held their own against the horses and we could have secured the flank for the rest of the battle. As it was, the whole battle turned on the throw of two dice. Grrrrrr!

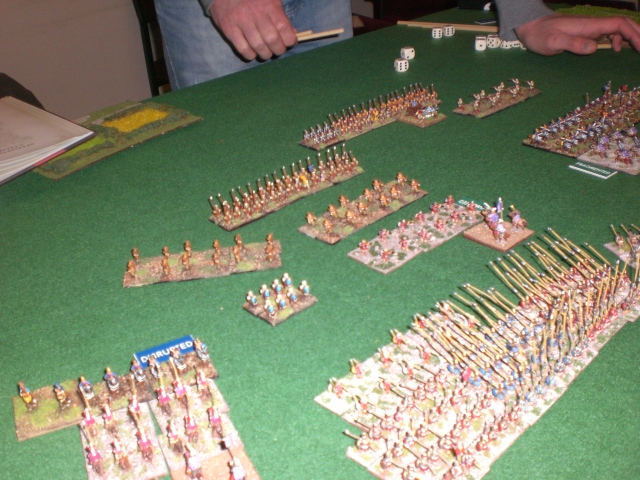
With the hypaspists gone, the above picture shows the majority of the remaining units. The Agema here should have just charged the hoplites ahead of them. But as my javelins (having Broken the Apple Bearers) chased the archers ahead of them into the Agema's path. My slingers also Fragmented their archers and chased them off - being charged in turn by Russ' hoplites.
My hoplites on the right took a base off the Saka cavalry in the melee and (had the hypaspists been close by) would no doubt have creamed them. However, the Persian Guard swung around and contacted them in the rear. Despite bravely holding on, they eventually succumbed to a Persian horse sandwich.

The pikes get stuck in.
Finally (once the skirmishers got out of the way) the pikes got into Russ' hoplites. Again, I should have charged these first with my Agema, but chose instead to waste them chasing archers around.
The pikes should have made short work of the hoplites, but my abject dice throwing was keeping them alive. However, once my hoplites joined in it became a slow grinding process with Russ losing bases and cohesion. He got some skirmishers in on the side to try and stem the tide but pike in 4 ranks are pretty unstoppable and they made little difference. In the end the brave Persain hoplites pretty much died to a man as bases were remorselesly removed.
Unfortunatley this counted for nothing. My own hoplites on the right flank were surrounded and destroyed while my skirmishers were running around at the rear. My camp was contacted and my Agema contrived to get themselves Broken by massed archer fire as they got trapped in Russ' rear.

The Persian hoplites go down fighting impossible odds, while the Agema stand still and get peppered to death.
Looking at the damage caused, it was clear that the Persians had won the day. By breaking the right flank, it meant I'd pretty much lost 3BG there, the camp was sacked and the Agema were broken. This was nowhere near enough to counter the loss of some Persian cavalry, the hoplites and the Apple Bearers. So victory to Russ - and back to the drawing board for me.
Lessons to be learned
1. To use the Agema against horses only.
2. Dont chase shadows. I wasted both my heavy cavalry chasing lost causes.
3. Massed pike in 4 ranks are rock hard - use this again!
4. Prodomoroi are not good in these battles - use something else instead.
5. The extra hoplites did well - may do that again.
6. Alexander is worth his weight in points. We made some unbelievable saves / bolsters
7. Hypaspists were unlucky. I must remind myself of that. Any other roll would have resulted in a very different battle.
8. Get the skirmishers into the Apple Bearers - only 2 bases makes them very vulnerable when exposed.
9. Don't throw double 1 for cohesion tests.