This will be interspersed with pics of the day, the John-O-Meter showing how our progress was going and other assorted bits.
So - without further ado....
Pre-game activity
As befitting such an epic battle, we had to settle down in the morning for coffee, croissants and banter. John hadn't seen the game table and was suitably impressed. He then saw the beach he was assaulting and was less impressed.
 |
| John's face sums it up as Mark shows where his division is coming in. |
We then had to don appropriate headgear to reflect the nationalities we were fighting for. We opted for a 'Union Jack Jackson' motif for our snug headgear while Russ and Ian went the whole hog and even got the specs to match their troops.
 |
| Ian and Russ get into character |
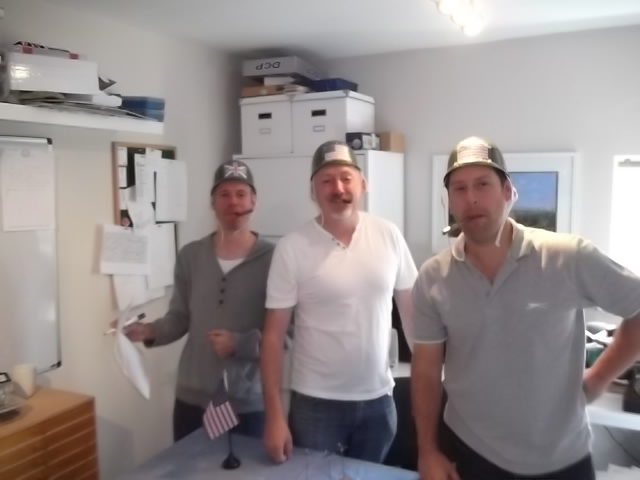 |
| John, Ian and myself - with ceegars and a bellyfull of attitude! Note the snug helmets (John is Union Jack Jackson, I'm O'Bannion, Mark isn't) |
The Plan
This was relatively simple. We had three bombardments to call in from the fleet and we called in all three on the eastern end of the island. This was to essentially kill everything there to provide a safe area to land the troops and provide a clear line of supply.
We also had to kill the two main guns on the island (these could shoot 360 degrees and killed anyhing it looked at - a bit like a couple of Eyes of Sauron. The pre-bombardment would hopefully kill one - the other would be the target of aircraft and destroyer attacks to keep it quiet.
With the big guns out of the way, we wanted to get as much stuff on the island as possible to preserve the foothold in the face of inevitable counter attacks at night (when the Japanese are at their strongest and we at our weakest).
 |
| The eastern beachead comes under intense bombardment |
And so it begins...
TURN 1
We had three battleships, three heavy cruisers and six cruisers giving pre-bombardment. This led to lots of dice being thrown but we had no idea as to the outcome.
After the battle, we were informed that the bombardments pretty much wiped everything in that area off the map - indeed our third (and possibly our second) was wasted as it hit nothing but destroyed bunkers and dead Japs. But we weren't to know.
Turn 1 saw the first of these salvos going in...
The area we were going for was designated Yellow 1 and Yellow 2.
Meanwhile at the other end of the island both destroyers managed to suppress Gun 1 on the western tip of the island - which they failed to clear. Another hit and we'd destroy it!
While the ships were banging away, the troops loaded onto the Amtracs and Higgins boats and headed for Yellow beach while the shells screamed overhead.
The Marines 1/8 on Amtracs as were the 1/6. The 2/8 and 2/6 were in Higgins boats, meaning they'd have to wade in through the surf. We thought this would be murderous if under HMG and artillery fire - hence the need to clear the area.
We also pre-planned an airstrike on Gun 2 (sitting atop Yellow Beach) just in case the bombardment didn't kill it. One aircraft was driven off by AA fire so we knew there was still something alive on Yellow. But two more aircraft dived in and dropped their bombs on target.
 |
| US Navy planes unload their bombs on Gun 2 |
The dice were taken off Mark as it was deemed too important. But we needed 11's and 12's - this was encased in concrete - and both bombs got close but (as far as we knew) no effect.
As we'd been shot at by AA we rolled to see if it was revealed - which is was! Two meaty AA guns overlooking Yellow Beach - and (as we found out later) these babies were very effective against Marines.
Simultaneously the accusations flew as regards how close the American troops would be to the shore and was settled when Mark threatened to drink all the imported Japanese beer in the fridge.
Smoke settled over the island...
Turn 2
More bombardment came in as the Amtracs and Higgins boats raced for the reef. This was John's roll and again we had no idea how effective it was. In fact it was as effective as the first and virtually everything in the target zone was hit. This is where the random effect came in - the Japanese dicing for which bunkers were hit.
The destroyers killed Gun 1 ("all that time painting it and it lasted 1 minute!") leading to much celebration on the American side!
 |
Amtracs and Higgins boats coming on towards the reef... |
 |
Heading for a apparently quiet shore...  |
We then lost two of John's Amtracs to indirect artillery fire which flamed up in the surf. Just as well we'd taken out the big guns because another two would have been smoking as a result.
 |
| The first hits - two Amtracs on fire in the surf before we even hit the reef! |
The Americans had to close our eyes again as more measurement took place - with accusations that they were tipping up the table to move more bunkers closer to our landing zone! But nothing else came our way.
Turn 3
The Amtracs moved up and over the reef while the Higgins boats stopped to unload their passengers while the last bombardment went in.
 |
| Amtracs race for shore as the Higgins debus... |
This is where - in hindsight - our first big mistake happened. We should have kept this last one in reserve in case we encountered a problem later in the battle. It hit virtually nothing and so was of no use.
The destroyers carried on their good work by suppressing another gun (close to Gun 1) and so stopping any fire from that corner of the island.
However, we were taking fire from somewhere as John lost another two Amtracs carrying infantry and onw carrying supplies. 5 down in just 2 turns!
 |
| John starts losing Amtracs as his troops jump out of the Higgins boats. |
My 6th Division was - however - unscathed and it felt like a trip around the bay for my Marines.
Turn 4
Ian looked a bit too happy for my liking (with that being the last of our bombardments) and he started rubbing his hands together. He's a great poker player as we found out Yellow Beach itself had been entirely scoured.
The Amtracs got the to the wire and we'd see if any mines would take out our Amtracs.
John manages to kill two of my Amtracs while I was taking some notes - I at least got the rest of them safelty through.
I also lost a Sherman in the water - not that they were likely to make it in any event. Meanwhile the Higgins boats turned back for the ships to collect the next loads - and we hadn't lost a single one!
 |
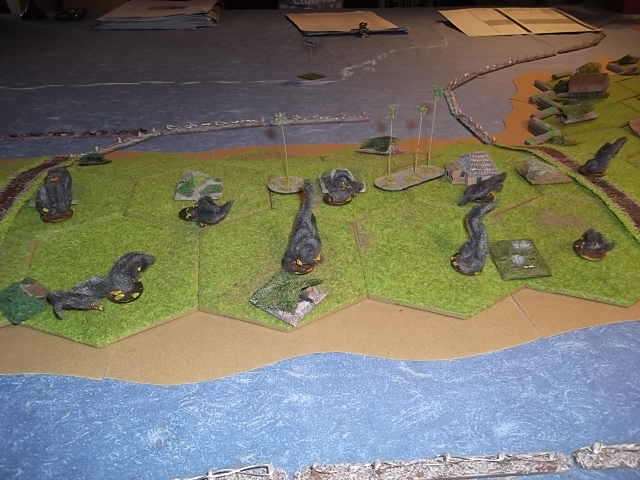
| The cratered Yellow Beach sector - extra cover for troops, more trouble for tanks. |
 |
| Where the incoming fire was coming from - the end of Yellow Beach and a whole heap of trouble for us. |
Russ then started talking in what sounded like Korean but it could have been the effect of an early morning beer.
The Japanese guns opened up again from the corner of Yellow Beach. One Amtrac was taken out and another was missed three times and suppressed. But it meant some guns were alinve, kicking and doing damage!
 |
| My Amtracs cross the wire as my tanks and remaining troops walk in under...no fire at all. |
 |
| Except John then loses two of mine to mines on the wire. |
 |
| Another Amtrac lost, and another becomes the target for every gun the Japanese can bring to bear. |
At the end of Turn 4 though we took stock. 7 Amtracs and no Higgins lost. No HMG fire on the troops by the wire - it looked like the plan was working! Supply was coming in with the troops, we were pretty intact and there were more on the way. All we had to do was turn 90 degrees and roll up both flanks!
The John-o-Meter seemed to reflect this...
 |
| The John-O-Meter. Blissfully happy with events so far. |
COMING SOON : TARAWA DAY ONE: TURNS 5 to 8.