So we gathered at Deeside Defenders at Broughton last night for the great Tarawa dry-run. The idea was to go through the special rules that Ian had drafted up, test some of the main principles (such as the effect of pre-bombardment and how long it takes the vehicles and men to get onto the beach) and maybe re-think strategies.
Clearly some of the scenery (such as the runway and anti-tank ditches) need to be added but what you see will not be much away from the 'real thing'.
 |
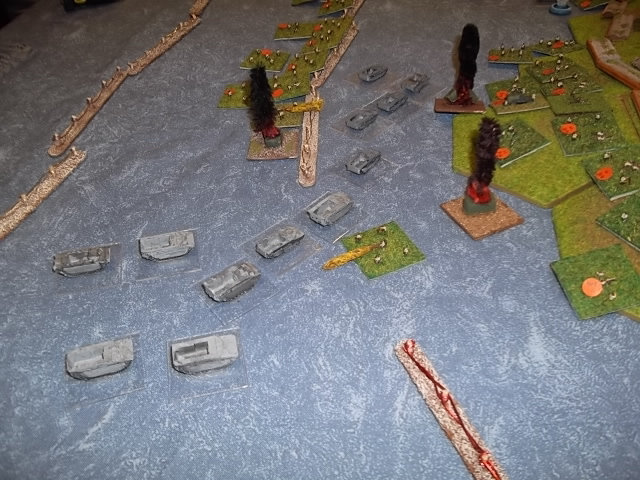
| Before we started - just seeing how things looked. Barbed wire, shell splashes, burning Amtracs, sea wall, bunkers and gun emplacements. And a flotilla of Amphibmods landing craft (amphibmods@hotmail.com for a price list). |
Pre Bombardment
The US can order in aircraft strafing runs and pre-bombarment using 3 Battleships, 2 Heavy Cruisers, 3 Light Cruisers. The Super Heavies hit on 3 pips, the Heavy Cruisers on 2 pips and the Lights on 1 pip. The way the rules work is this - the defenders choose the pips on the dice (say 1,2 and 4 for the Superheavies, 5 and 6 for the Heavies and 3 for the Mediums) but DON'T tell the attacker how many hits . The attacker rolls the requisite number of dice for each ship type to see how many hits are inflicted (2 hits = kill, 1 = Suppressed).
The hits also determine how cratered the ground under bombardment becomes - great for infantry (+1 cover) but lousy for tanks (bogged down / stuck).
 |
| Some of the allied craft (mostly Amphibmods) with two 1/600 destroyers to provide close support. |
The attacker determines how many hexes they want to hit and call all shots into the designated area. The tighter the area, the more likely that whatever is in there will be blatted - but means less enemy units will be hit. The original idea was that the defender could choose which units were hit. In the first trial we got 12 'hits' which the cunning Japs placed on their re-inforced bunkers meaning they were only 'suppressed'. This also meant that as the Americans came in they'd have 3-4 turns at least to unsuppress them - meaning that the pre-bombardment would have no effect at all.
So we tweaked the rule to bring an element of randomness to it (which - after all - would better reflect an incoming storm of shells). The 'hits' would therefore be allocated randomly (using whichever dice corresponded closest to the number of hits). In the second trial we got a whopping 17 hits and used a d20 to determine what got hit. This method led to a scouring of the corner of the island with virtually all MG nests and most heavy guns (including the big 200mm) getting wasted.
We found this a fairer system and that's what we'll be going with.
Amphibious Landings
There is a reef 12" from the shore. Only Amtracs can clear the reef - landing craft have to drop troops off at the reef and go back for more. Therefore the troops have to wade in at 1/2 speed - so it will take 4 turns to get to the beach!
 |
| Supply ships |
We didn't use the jetty (which extends beyond the reef) and it looks like it will be vital to providing supply to the troops.
 |
| Smoke insert to mark where an Amtrac died. |
We started off with a destroyer accompanying the landing craft. The Japanese anti-ship artillery have to shoot at destroyers first and then landing craft. Ian blazed away at our destroyer and managed to miss every time (Russ had to take over and sink it in the end). This saved the lives of a few landing craft but we learned not to bring destroyers in until the big guns were killed.
Artillery and mortars get a +1 (pre-sited) for infantry against the sea wall - although MG's get a -1 for troops behind the wall. But MG's can ignore targets behind the wall if there are troops in the water.
Barbed Wire
This will be a pain in the real battle. It not only holds up infantry for a turn to cross but also kills a vehicle on a '6' - every time they cross the wire (coming in and going back). This is to simulate Japanese mines / tetrahedrons etc. In hindsight this can be horrificly damaging (see below) and creates a priority for engineers to clear paths through the wire before the Amtracs are blown to bits.
 |
| Mark - the American commander (with only one arm) and Ian - Japanese commander (with two arms). |
 |
| Russ gets in on the act as we explain to Mark for the 8th time how pre-bombardment works. The top of the island ringed with barbed wire shows the scale involved. You couldn't do this in 28mm! |
Anyway - on to the main event.
Russ and Ian (the Japanese defenders) had a conflab and laid out their dummy bunkers. We then went with only one pre-bombardment (hoping for another 17 hits). The defenders consulted their arcane charts and threw a couple of dice - clearly we hadn't done much damage! But we had no idea what we HAD done.
 |
| Japanese bunkers - which are real, which are dummies? We have no idea! But there's a lot of them! |
 |
| In go the Yanks! |
 |
| The big gun opens up - and misses! |
 |
| Close but no cigar, Tojo! |
The landing craft stopped at the reef to unload the troops while the Amtracs continued on to the barbed wire.
As the Americans, we know our Amtracs are vital. The landing craft can only unload at the reef or jetty. Only the Amtracs can go all ther way to the beach - making their role in terms of supply vital.
To explain - once troops make the beach, they can't move off until supplied. Same with tanks, flamethrowers, 37mm guns. Nothing moves until it gets supplied - nothing attacks until supplied.. No supply - you're stranded. This will therefore make logistics a key element of the battle.
One rule that Ian had created had to be amended on trial. This was that it requires 1 unit of supply to move 4 units. If this was over any distance it would be fine but we found that a unit of troops carrying supplies take 4 turns to get to the beach - and so would land with no supplies at all! Clearly this was unworkable. So I suggested that each unit came in with one unit of supply but if they got killed, the supply was lost.
So if 8 infantry units are unloaded at the reef and make it through the wire but only 3 units make it to the sand, then only 3 units of supply make it. It sounded fairer and will be what we go with.
 |
| Amtracs cross the reef with ease, and head for the barbed wire while the Higgins boats unload troops at the reef. |
Back to the action. As the destroyer was being targeted, the Amtracs rushed over th reef at full speed while the Higgins boats unloaded at the reef. Only 4 turns at half speed under arty and MG fire to go! The rear echelon troops only hope was that the leading troops would block the fire that would otherwise fall on them.
 |
| Out jump the troops on the reef with a splish splash splosh |
 |
| You sank my battleship...well, destroyer anyway. |
 |
| 5 Amtracs down to mines in the barbed wire. D'oh! |
 |
| The First division unloads as the second still take casualties far from the beach. |
 |
| The 1st Division gets to the sea wall and the Amtracs wait for the wire to be cleared. Just to the left you can see the second wave just getting to the wire - with engineers again looking to clear the wire and obstacles. |
 |
| The 2nd takes a hammering - 7 Amtracs gone! The second wave gets to the wire as the surviving Amtracs wait to get clear. |
 |
| More carnage as the Japanese guns open up on the remaining Amtracs waiting for the wire to be cut. |
 |
| The wire is clear! |
 |
| The view down the beach - not encouraging! |
However (we assume a lucky hand grenade) the 1st managed to penetrate the 200mm emplacement and blew it up! A collective cheer was heard from the Amtrac crews.
 |
| Die, Big Gun, Die! |
The 2nd were also wall-hugging, but the Japs had the area zeroed in and mortar rounds came down - inflicting more casualties. This led to a morale test - failed - so the 2nd were all Suppressed and stuck.
At this point the Japanese could have launched an infantry attack and bounced the 2nd right off the island. Except - as we then discovered - our bombardment had been rubbish. Only 4 hits BUT we'd miraculously killed the C in C by landing two hits on his bunker! The power of a random element to pre-bombardment! The Japanese were unable to move without orders.
 |
| Stuck on the beach without supplies. |
We ended it there. A good test we think. Some rules modified, some lessons learned and a lot to think about.
And a lot of scenery to finish!