While all mine hit safely, John managed to lose another two to incoming fire and another two on the wire (rolling 8,8 for his first two rolls). Amazingly we still had tanks making their way in – as opposed to floundering in the water and we hit the beach in numbers
 |
| John smiling despite losing Amtracs at a rate of 3 a minute |
 |
| John gets ashore and starts unloading the 2nd Division |
 |
| My 6th Division lands unopposed and virtually unscathed. |
No more destroyer fire could come in – they’d used up the ammo for the morning. Totally unrelated, John lost the first of the Higgins boats – two blown at the far right of the line. He was driving Mark to distraction as all the vehicles that were due to bring the next load in were either on the beach or smoking in the sea. Luckily I was returning my vehicles back virtually intact – except for the tanks, of course.
Also in John’s sector, a unit of infantry carrying supplies were killed – as was another Amtrac.
So while my boys were paddling in the surf and setting up barbeques and sunshades, John was catching the full brunt of the Japanese response. This was especially true of the infantry who jumped out of the Amtracs and were gunned down by a 20mm gun outside the command bunker.
Russ was in charge of the dice and he’d turned in an awesome display so far – hitting with virtually every shot.
 |
| More troops pour ashore on Yellow 1 and 2 |
 |
| What NOT to roll for cohesion tests |
 |
| A jubilant BANZAI from our opponents |
 |
| The result - the 2nd Division is suppressed and can't move. |
Turn 6 – 12 noon.
We had a break for drinks – Coke, coffee or beer depending on taste, so a bottle of Ichiban for me!

At this stage we thought we were doing better than the original Marines had done. Most of our first wave were on the beach – mine unscathed and the second waves were already making good progress.
What we should have done was change the 3rd wave to accommodate the artillery to come in on my sector – set up and start dropping HE and smoke on the troublesome guns that were making life hard for John. Instead, we continued to pour troops ashore in increasing numbers. This meant our landing zone was getting crowded. As John was suppressed he couldn’t push out and create space. A log-jam was the consequence.
 |
| My sector - quiet, safe and secure! |
 |
| Supplies rolling in unopposed. Lovely! |
At least we had plenty of supplies. A lesson learned from the dry-run – troops without supplies get stuck and die. So not only did supplies come in with each wave, the third wave had a special ‘supply only’ wave of amtracs.
Both my Shermans made it (somehow) to the beach. Both John’s Stuarts also made it, but one managed to flounder at the water’s edge.
The area by me was now clear for our own version of the Red Ball express and became the key landing zone for supplies.The only Japanese movement of the morning was limited to Russ lifting his arm to drink his beer.
 |
| The only Japanese movement all morning... |
John wasn’t finished though. Feeling that he hadn’t quite done enough self-inflicted damage, he ‘killed’ three more Amtracs trying to get back to the ships across the wire! We think he killed more Amtracs than the Japanese did!
Then again, I managed to kill two myself in the same manoeuvre. We’d lost 16 Amtracs and 2 Higgins to date – mostly to mines on the wire. I hate to think what the casualties would have been if we’d been using a d6 rather than a d8. However, given our later inability to throw 6’s at all, they probably all would have got through safely!
Japanese fire then came in and two more Amtracs fell. All John’s sector was covered in smoke from the Amtracs he’d lost.
 |
| Nothing to see but burning Amtracs - mainly killed by John himself. |
Turn 7 1pm
I manage to get one Sherman on the beach but like John manage to lose one at the water’s edge – cure more Jap celebrations and curses from myself.
While all my troops made it ashore with virtually no casualties, John’s 2/1 and 2/2 get another hammering.
Japanese indirect fire suppresed one unit and the 20mm killed another – and yet another Amtrac was destroyed by an AA gun covering the anti-tank ditch.
 |
| My section - nothing to see here! |
My troops surged over the landing zone and found Gun2 to be a smoking ruin – as was just about everything else in the sector.
 |
| General mayhem on our right - where John lives. |
Turn 8 (2pm)
Before we started the turn there was a quick discussion regarding mopping up and who can spot what – which was important before we progressed too far into the island. We also found that area fire needs an HQ to call it in – so the need to get HQ’s close to the front became paramount.
My Engineers start clearing the wire and I made a space for the Amtracs to get through. The supply Amtracs went in on John’s side as he’d been so badly mauled during the run-in. My 6/2 troops begin mopping up and find nothing alive – anywhere – and so start to make way for the next waves coming in. Meanwhile 6/1 turn to engage the Japs further up the island and the 3rd struggle through the surf to join them. We find that the AA guns we’d seen shoot at our aircraft had also been marmalised. Good!
 |
| Nothing alive apart from Marines. |
 |
| A Sherman actually makes the island. Praise the Lord! |
The main result was that we’d lost going on for over 1/3 of Amtracs. Note that I bring all but 4 Amtracs back intact – John leaves 15 smoking in the surf! I’ll say no more…
My Sherman had made it to the shore and starts shooting – probably from sheer relief at getting there! I try to move him inland and – FFS! – roll a 1 and he falls into a shell crater, never to be seen again! Bloody dice!
This was not helped by John saying “You’ve lost all your bloody tanks!”
As John’s 2/1 is suppressed its up to the 2/2 to move past them and take on the guns that have smashed their brothers.
The John-O-Meter suggests that John is smiling on the outside, crying on the inside.
 |
| The smile doesn't fool anyone. |
But at least supply – and lots of it – is coming in fast.
Just as well, as Japanese fire from an anti-tank gun and AA gun knocked out another 2 of John’s Amtracs!
 |
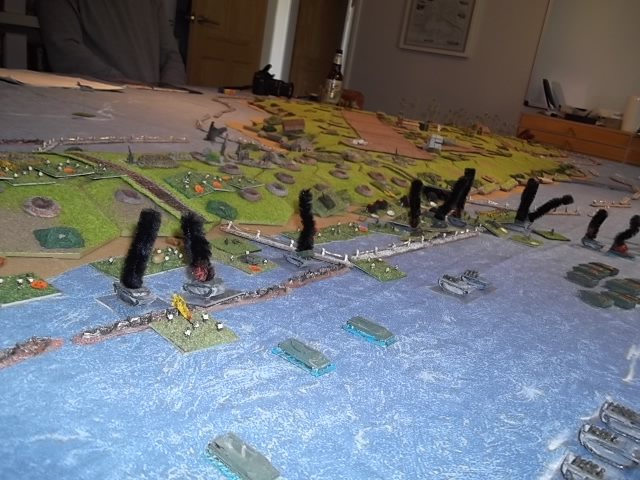
| The third waves come steaming in - welcomed by a string of burning US metal hulks. |
 |
| The 6/1 move up as the 6/2 mop up. |
John starts close assaulting with 2/2 but has to wait for the HQ to get there to get the 2/1 going.
This prompted the famous line “You want to live…get off the beach” from Mark ‘Patton’ Shakespeare.
Which was as good a time as any to break for lunch. Which we did. Pizza was the order of the day and we tucked in and discussed the outcome so far. Which was fairly OK but not as good as we would have liked,
And night was fast approaching...
And night was fast approaching...
Day One Turns 9 to 12 to follow